Get started
Start with one device. Once it works, you can add more later. The whole process takes less than 10 minutes.
Check these before you start
- Shelly device installed: if the device needs electrical wiring (e.g. in your fuse box), always use a qualified electrician. Plug-in models you can install yourself.
- Wi-Fi working: your phone is connected to the same home network that Shelly will use.
- Email access: you need it for registration.
- One device is enough: start with one device, for example a water heater. Add more later.
What you will do in this guide
- Create an Optimaatti account and copy your connection details
- Connect your Shelly device to your home Wi-Fi
- Link Shelly to Optimaatti using the connection details
- Create your first automation and start saving
If something doesn't work
The most common cause is a typo in the connection details or the wrong Wi-Fi network. Check those first. If the problem persists, see the troubleshooting guide.
Create a free Optimaatti account
Sign up for the app. You will also get your device connection details.
- Open `https://app.optimaatti.fi` on your phone or computer.
- Tap `Register` and create an account with your email.
- Open the verification email if one is sent.
- Sign in. Keep the app open - you will need it for the next steps.
Copy the connection details
These details connect your Shelly device to Optimaatti. You will find them in the app.
- Open the `Connection details` page in Optimaatti (found in the menu).
- You will see four values: server address, port, username and password.
- Copy them or keep the page open in another tab.
- Use the values exactly as shown. Do not change them.
Connect Shelly to your home Wi-Fi
The Shelly needs to be on the same Wi-Fi network as your phone.
- Power on the Shelly device.
- Open the Shelly app (App Store / Google Play) and follow its guided setup.
- Choose your home Wi-Fi network and enter the password.
- Once connected, the Shelly will appear in the Shelly app.
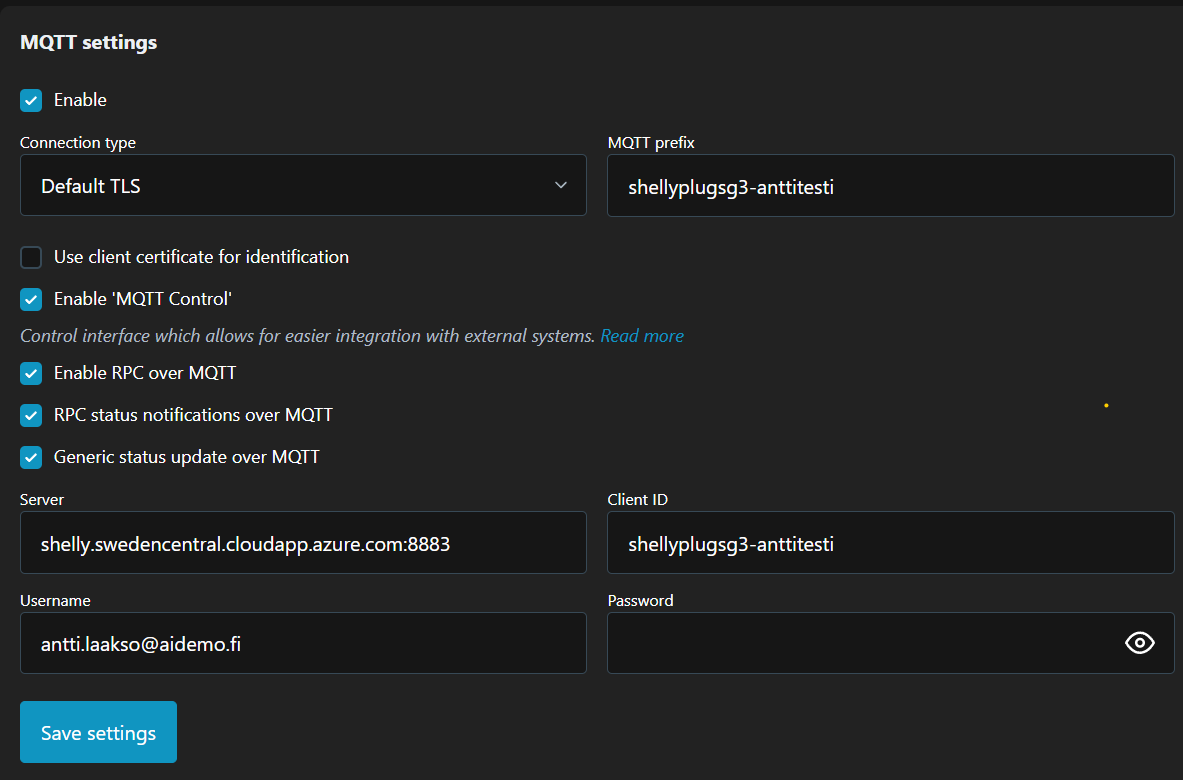
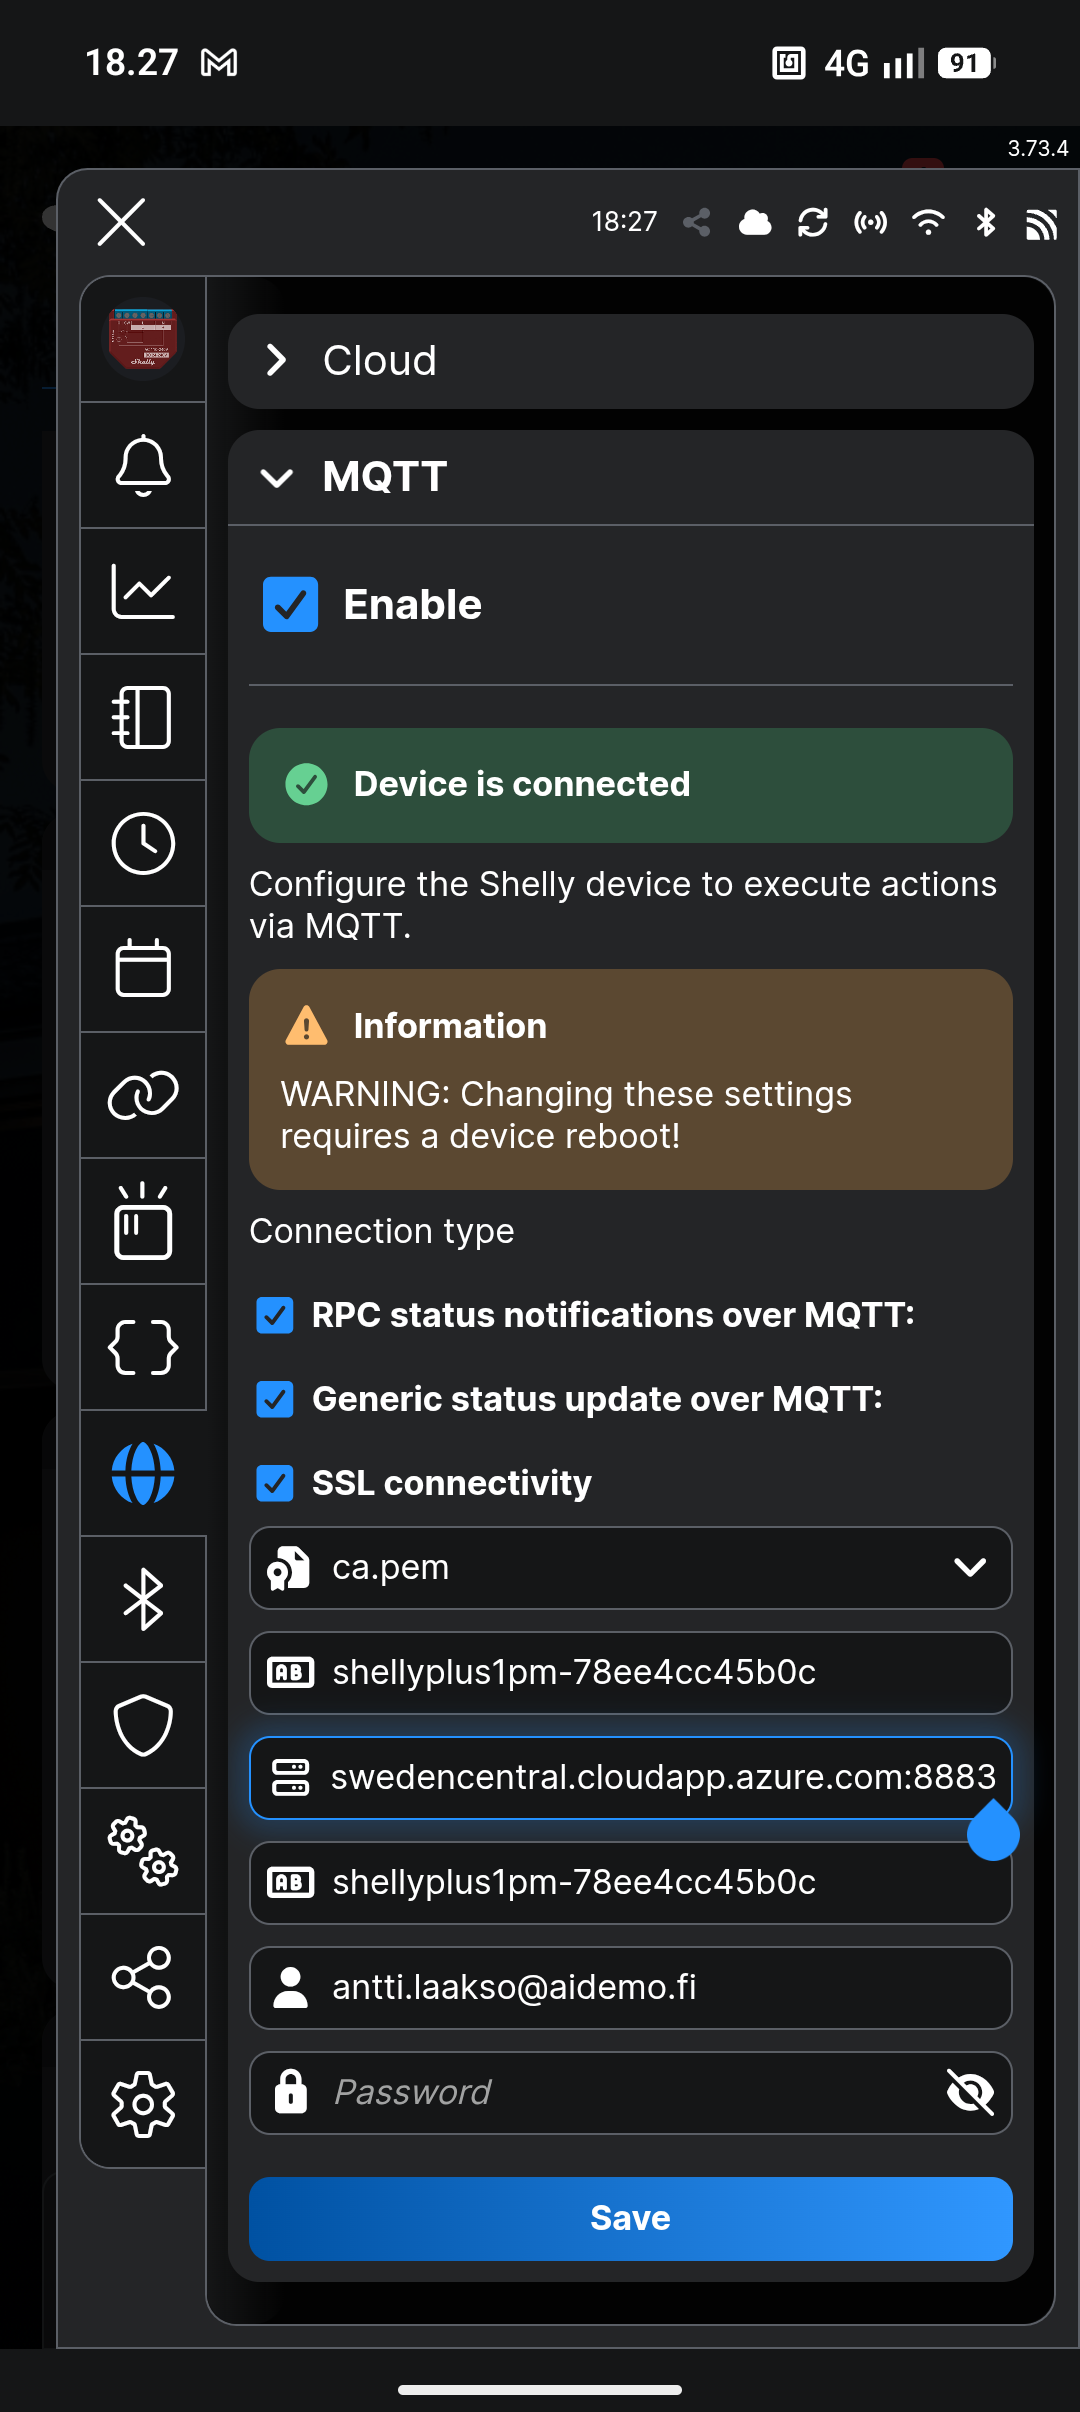
Link Shelly to Optimaatti
Now enter the connection details into your Shelly device.
- Open the Shelly device settings (from the Shelly app or by browsing to the device IP address).
- Find the `MQTT` section in settings and turn it on.
- Enter the server address, port, username and password you copied from Optimaatti.
- Check for typos or extra spaces in the fields.
- Save. The Shelly will connect to Optimaatti in a moment.
Check that the device appears in Optimaatti
When the connection succeeds, the device will appear in the Optimaatti app.
- Go back to Optimaatti and open the `Devices` page.
- Wait 1-2 minutes. The device will appear in the list automatically.
- Give it a clear name, like `Water heater` or `Kitchen floor heating`.
- If the device doesn't appear, check the connection details and Wi-Fi.
Tell the app what the device controls
Choose the device type so the app can suggest the right settings.
- Open the device details and tap edit.
- Choose the device type: water heater, heater, light control or other.
- If the device measures electricity use, enable metering - you will see consumption in the app.
- Save. The app will suggest an automation next.
Create your first automation
Now turn on the savings. The app will suggest a suitable automation.
- Open `Rules` and tap `Create new rule`.
- Select the device you just added.
- Start with a simple template: for example `Cheapest hours` shifts usage to the most affordable times automatically.
- Save the rule. You will see on the timeline when the device is on and when it is off.
- You can always override the automation and control the device manually.